Timeline自定义轨道实现
这篇文章将介绍如果实现一个自定义Timeline轨道。

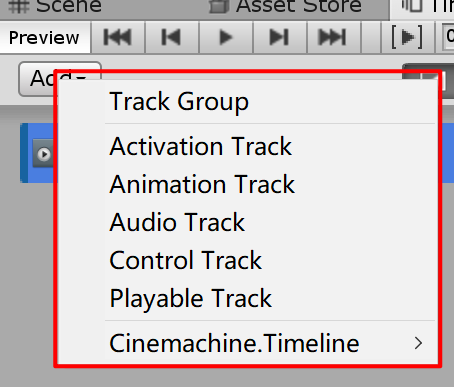
如上图所示,如果我们要实现自定义的Timeline轨道至少要创建4个脚本——CutomTrack,CustomClip,CustomMixer和CustomPlayableBehaviour。
(Custom代表你们想实现的Timeline的名字,比如要控制灯光,可以叫LightControllerTrack等等)接下来,我会分别介绍简单的代码和文字来介绍这四个脚本的作用。
1.CustomTrack(继承自TrackAsset)
[Serializable]//保证序列化
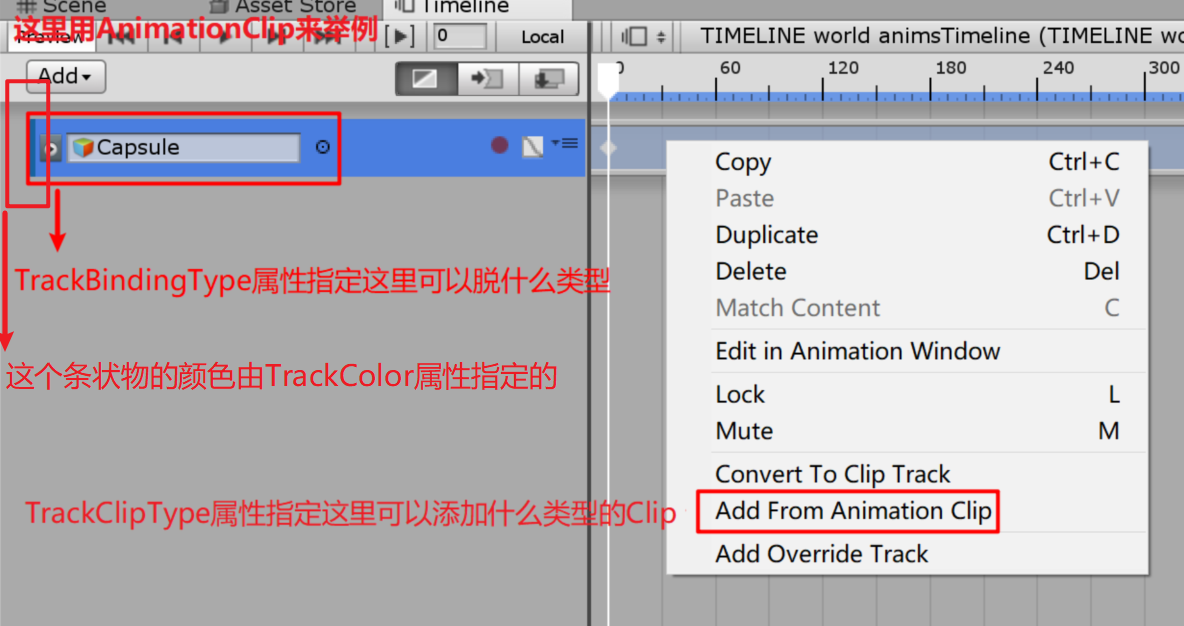
[TrackClipType(typeof(CustomClip))]//表示Track添加哪种Clip
[TrackBindingType(typeof(GameObject))]//表示Track绑定哪种类型的对象(GameObject或者任何Component等等)
[TrackColor(0.53f,0.0f,0.08f)]//表示在编辑器中,Track轨道前端的标识颜色(不重要啦)
public class CustomTrack : TrackAsset
{
    //重写这个工厂方法,播放轨道的时候就会创建Mixer。
    public override Playable CreateMixer(PlayableGraph graph,GameObject go,int inputCount)
    {
        var mixerPlayable = ScriptPlayable<CustomMixer>.Create(graph);//这个是被CustomMixer驱动的Playable,mixerPlayable.GetBehaviour() as CustomMixer;就可以获得CustomMixer了
        mixerPlayable.SetInputCount(inputCount);
        return mixerPlayable;
    }
}
由名字可以看出来,这个类代表轨道。当你完成类声明的时候,就可以在TimelineWindow添加这个轨道了。

CustomTrack的作用
1.轨道资源本身,CustomTrack代表轨道资源。
2.声明可添加的绑定资源类型。
2.声明可添加的片段资源类型(ClipAsset),通过TrackClipType属性,来告诉编辑器,你可以在轨道添加那种Clip
3.创建Mixer。(Mixer的作用下面再说)

2.CustomClip(继承自ClipAsset)
[Serializable]
public class CustomClip : PlayableAsset , ITimelineClipAsset
{
    //从命名可以看出,这里template一个模板,Clip会在运行时,根据你赋值好的template再创建出一个新的对象。
    //下面会说到,CustomPlayableBehaviour我们最好只放数据,逻辑由mixer来实现
    public CustomPlayableBehaviour template = new CustomPlayableBehaviour();

    //ExposedReference的作用,如果没有ExposedReference的话,你是不可以引用Scene里面的引用的(只可以从Assets的东西进来)
    public ExposedReference<Transform> exampleValue;

    //ClipCaps是必须实现的一个属性,代表了你的Clip支持哪些功能,并影响你编辑器对Clip的操作。
    //比如,Blending代表你的Clip支持融合。在编辑器中,你可以将两个Clip拖到共同时间段,并且你可以编辑融合的融合曲线。
    //如果开启了融合,每个时间段Clip(这里是指CustomPlayableBehaviour)的权重不只是0和1.可能同一时间两个Clip的权重都是0.x。(当然,你要自己根据权重实现相应的融合逻辑,不然一切都没意义。)
    //在IDE中,看ClipCaps的声明可以了解更多
    public ClipCaps
    {
        get{ return ClipCaps.Blending; }
    }

    //重写这个工厂方法,播放轨道的时候就会创建ScriptPlayable<T>,由一小节关于playable,ScriptPlayable是由
    //playablebehaviour驱动的一种特殊的playable(同时也是个接口体)
    public override Playable CreatePlayable (PlayableGraph graph,GameObject owner)
    {
        var playable = ScriptPlayable<CustomPlayableBehaviour>.Create(graph,template);

        CustomPlayableBehaviour behaviour = playable.GetBehaviour();
        behaviour.exampleValue = exampleValue.Resolve(graph.GetResolver());

        return playable;
    }
}
CustomClip的作用:
1.片段资源本身,CustomClip代表片段资源。
2.作为工厂,在运行时根据你在编辑时给模板赋的属性创建CustomPlayableBehaviour。
3.定义Clip支持哪些功能。融合(Blending),外插值(Xxtrapolate) 等等。
3.CustomMixer(继承自PlayableBehaviour)
public class CustomMixer:PlayableBehaviour
{
    public override void OnPlayableCreate(Playable playable)
    {
        ...
    }
    public override void OnPlayableDestroy(Playable playable)
    {
        ...
    }

    public override void PrepareFrame(Playable playable, FrameData info)
    {
        ...
    }
    public override void ProcessFrame(Playable playable, FrameData info, object playerData)
    {
        for(int i = 0 ; i < playable.GetInputCount(); i++)//获取轨道上所有的片段
        {
            float weight  = playable.GetInputWeight(i);//获取片段在当前帧的片段
            var clipPlayable = (ScriptPlayable<CustomPlayableBehaviour>)playable.GetInput(i);
            CustomPlayableBehaviour behaviour = clipPlayable.GetBehaviour();//获取CustomPlayableBehaviour
            ...//接下来你可以根据Clip的权重写相应的逻辑(如果你没有在ClipCaps里设置blend的话,应该只有一个片段的权重是1,其他为0)
        }
    }

    //上面4个虚方法是最常用的,OnBehaviourPause不建议使用,不太好掌控(会因为各种原因暂停)。直接根据time值得变化判断是否暂停也挺好得
}
从上述代码,我们可以看出Mixer可以获取当前帧轨道上所有轨道,以及相应的权重 。也因为这个能力,unity官方建议我们CustomPlayableBehaviour只储存数据,而功能里写在CustomMixer上。因为CustomPlayableBehaviour只能获取自己这个片段的信息,而CustomMixer能获取轨道上所有片段的信息,所以可以对多个片段进行处理(类似融合)。而如果逻辑写在CustomPlayableBehaviour是不行的。
4.CustomPlayableBehaviour(继承自PlayableBehaviour)
public class CustomPlayableBehaviour:PlayableBehaviour
{
    public Transform exampleValue;
}
CustomPlayableBehaviour(或者叫CustomClipData)负责声明每个Clip在运行时所需的字段。
延申介绍:Playable
Playable是Unity定义的一个结构体,代表一切可播放的事物(视频,动画,声音等)。 1.它可以用来创建复杂和灵活的数据,并作为树(tree) 的节点连接在一起。 2.它可以给自己的每个子节点设置权重(weight)。
**ScriptPlayable
参考:
https://docs.unity3d.com/ScriptReference/Playables.Playable.html
Unite Europe 2017 - Extending Timeline with your own playables
